关于代码高亮
Hexo自带了高亮的特性,在_config.yml文件中,配置Hightlight:enable: true即可,同时也拥有一些配置属性,如显示行号等,但效果并不美观,所以计划使用第三方的高亮插件提替换。
第三方的插件,笔者尝试过:Google Code Prettify 和 prism。其中:
- 在使用第三方插件时,需要将默认的highlight属性关闭,即:Hightlight:enable: false。
- Google Code Prettify 样式丰富,支持自动检测代码类型,在
code时,无需声明代码类型。 - Google Code Prettify 需要下载其资源,将js/css等手工加入当前theme中,并需要手工在当前theme的布局文件中引入js/css。
- Prism 样式也比较丰富,但需要在编写时指定代码类型,如:
java \r\n code. - Prism使用npm安装的方式(npm i -save hexo-prism-plugin),直接安装Prism模块,无需手工修改页面文件。
关于Hexo自带的highlight
- hexo自带的hightlight并未启用,需要通过配置_config.yml来开启。
- 配置:
highlight: enable: true line_number: false auto_detect: false tab_replace: false - 属性说明:
- a. enable: 启用
- b. line_number: 渲染行号
- c. auto_detect: 自动判断语言
- d. tab_replace: 将tab替换为空格。
- 重启即可。
- hexo clean & hexo g & hexo s
- 默认展示样式:

- 启用highlight后

关于高亮 Google Code Prettify
- 当前博客使用的主题是next,计划使用 Google Code Prettify的高亮效果。
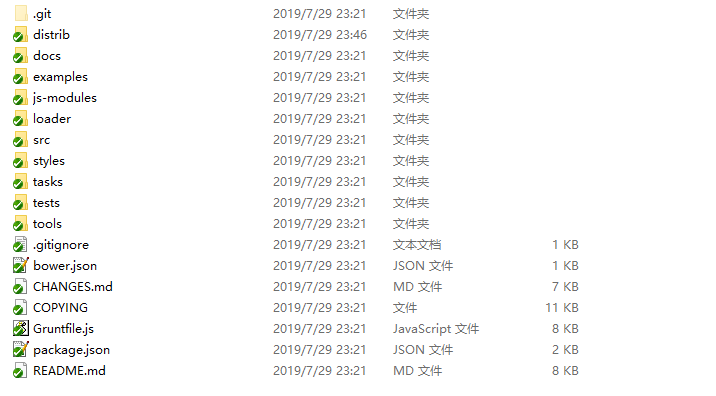
- 下载google-code-prettify(https://github.com/google/code-prettify),下载后结构如图:

- 其中,distrib:用于分发的版本,src:源码。
- 解压distrib目录中的“prettify-small.zip”,得到完整的文件夹“google-code-prettify”。
- 将文件夹“google-code-prettify”完整地拷贝到在博客目录的主题路径下:themes\next\source\lib,lib中一般为引用的第三方内容。
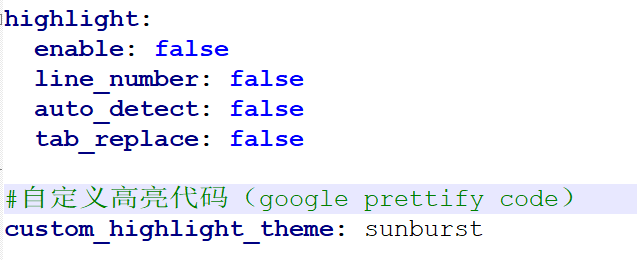
- 进入hexo的_config.yml中:关闭自带的高亮,并增加google prettify code配置
#关闭自带的高亮
 highlight:
   enable: false
   line_number: false
   auto_detect: false
   tab_replace: false
# 增加google prettify code配置
 #自定义高亮代码(google prettify code)
 custom_highlight_theme: sunburst
- 进入next主题目录下themes\next\layout,编辑文件_layout.swig,增加google prettify code配置。
<!-- 20190730 增加代码高亮设置(特地增加了判断非空,不加也没关系)--> {% if theme.custom_highlight_theme %} {% endif %} <!-- 20190730 增加代码高亮设置 end --> - 重新部署后,可以看到效果。

- 配置显示行号,google-code-prettify 默认每五行显示一次行号,如果想要显示所有的行号,我们只需要在 google-code-prettify 对应主题的 css 文件中找到下面一样把它注释掉即可:
li.L0,li.L1,li.L2,li.L3,li.L5,li.L6,li.L7,li.L8 { list-style-type: none }

- 需要注意,代码无需声明类型。
 /**
  * 测试用
  */
 public class Test {
     public static void main(String[] args) {
         System.out.println("Hello World!");
     }
 }
关于高亮 Prism
- 当前博客使用的主题是next。
- 使用如下指令安装Prism模块。
npm i -save hexo-prism-plugin
- 配置文件_config.yml关闭hexo自带的样式。
a. highlight: enable: false - 配置文件_config.yml启用prism。额外地,custom_css支持自定义的样式。
prism_plugin: mode: 'preprocess' theme: 'tomorrow' line_number: false custom_css: - 重启即可。
hexo clean & hexo g & hexo s
- 需要注意,代码要声明代码类型。
 /**
  * 测试用
  */
 public class Test {
     public static void main(String[] args) {
         System.out.println("Hello World!");
     }
 }
