配置主题风格
- next主题提供了不同的外观风格,配置_config,yml文件中的scheme属性即可。注意:不同风格间的大部分属性都可以公用,除了一些注释特别说明的属性只能在某些风格下使用。
- scheme有四种不同风格:Muse、Mist、Pisces、Gemini
- 配置主题_config.yml文件
- 属性:scheme,如配置为Gemini
- 可选值:Muse、Mist、Pisces、Gemini
- 如设置为:
scheme: Gemini
配置侧边栏
- 侧边栏可以出现在网页的左侧/右侧,可以有不同的显示时机。默认情况下,侧边栏在主页不展示,当打开具体页面后才出现(不同显示风格的默认情况也不一样)。
- 配置属性为:
sidebar - 配置显示位置:
- sidebar.position:显示位置
- 可选值:left(左侧)、right(右侧)
- 如设置为:
sidebar.position: left
- 配置显示时机
配置头像并设置旋转
- 头像存储在文件夹:
themes\next\source\images - 准备自己的头像,最好是正方形或圆形的,显示时会自动缩放,正方形或圆形避免失真。如:photo.png
- 配置主题_config.yml
- avatar.url:图片路径,如:/images/phtoto.png
- avatar.rounded:是否显示为圆形
- avatar.rotated:鼠标移动到头像时,是否旋转。
- 示例
# Sidebar Avatar
avatar:
# In theme directory (source/images): /images/avatar.gif
# In site directory (source/uploads): /uploads/avatar.gif
# You can also use other linking images.#/images/avatar.gif
url: /images/sky-square.jpg
# If true, the avatar would be dispalyed in circle.
rounded: true
# If true, the avatar would be rotated with the cursor.
rotated: true
配置网站favicon图表
- 图表文件存储在文件夹:
themes\next\source\images - 准备图表文件,分别为:
16*16像素,32*32像素,如:favicon-16-16.png,favicon-32-32.png。 - 配置主题_config.yml
- favicon.small:/images/favicon-16-16.png
- favicon.medium:/images/favicon-32-32.png
配置阅读进度
- 阅读进度会在页面的顶端,以一个x像素的高度显示的进度条来标识。
- next阅读插件theme-next-reading-progress:
https://github.com/theme-next/theme-next-reading-progress - 在hexo根目录安装插件:
git clone https://github.com/theme-next/theme-next-reading-progress themes/next/source/lib/reading_progress- 注意:这里文件夹名称必须写成下划线。
- 配置next主题_config.yml:
reading_progress: enable: true color: "#37c6c0" height: 2px - 配置阅读进度时,如上例中可以设置进度条的高度、颜色。
配置页面加载进度
- 博客页面的加载Loading动画。插件pace:
https://github.com/theme-next/theme-next-pace - 在hexo根目录安装插件
git clone https://github.com/theme-next/theme-next-pace theme/next/source/lib/pace
- 配置next主题_config.yml
# Progress bar in the top during page loading. # Dependencies: https://github.com/theme-next/theme-next-pace # For more information: https://github.com/HubSpot/pace pace: enable: true # Themes list: # big-counter | bounce | barber-shop | center-atom | center-circle | center-radar | center-simple # corner-indicator | fill-left | flat-top | flash | loading-bar | mac-osx | material | minimal theme: corner-indicator- pace.enable:是否启用进度条,默认为false
- pace.theme:pace主题样式(从
https://github.com/HubSpot/pace处可查看)
- 查看样式(主题为:corner-indicator):

配置建站时间
- 建站时间配置后,将在网页底部显示诸如
@2019字样。 - 配置主题_config.yml文件:
footer:
since: 2019
- footer:since属性
配置文章显示摘要
- 首页文章有时内容比较多,完全显示的话会占用很大空间,所以最好能显示文章的部分内容摘要。
- 配置主题_config.yml
- auto_excerpt.enable:启用摘要形式
- auto_excerpt.length:摘要截取的字符长度
- 特别的,next不建议使用这种形式,最好在文章内部加入如下标记,可以精确控制要显示的内容:
<!-- more -->,hexo会自动提供“阅读全文”的按钮
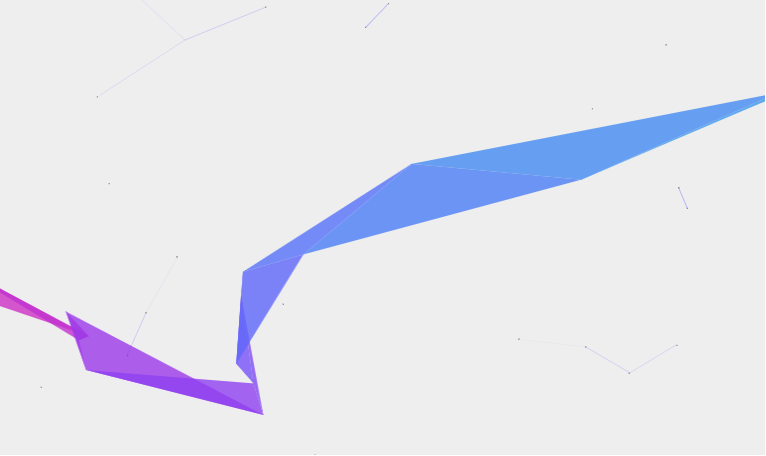
配置彩虹背景
- 博客页面背景中,可以展现一条彩虹背景。插件为theme-next-canvas-ribbon:
https://github.com/theme-next/theme-next-canvas-ribbon - 在hexo根目录安装:
git clone https://github.com/theme-next/theme-next-canvas-ribbon themes/next/source/lib/canvas-ribbon
- 配置主题的_config.yml
# Canvas-ribbon # Dependencies: https://github.com/theme-next/theme-next-canvas-ribbon # For more information: https://github.com/zproo/canvas-ribbon canvas_ribbon: enable: true size: 60 # The width of the ribbon alpha: 0.8 # The transparency of the ribbon zIndex: -1 # The display level of the ribbon - 属性说明
- canvas_ribbon.enable:启用
- canvas_ribbon.size:彩虹宽度
- canvas_ribbon.alpha:彩虹透明度
- canvas_ribbon.zIndex:网页显示层级
- 查看效果

配置代码块的复制按钮
- 代码块中可以增加复制按钮
- 配置主题_config.yml文件
codeblock: # Code Highlight theme # Available values: normal | night | night eighties | night blue | night bright # See: https://github.com/chriskempson/tomorrow-theme highlight_theme: normal # Add copy button on codeblock copy_button: enable: true # Show text copy result. show_result: true # Available values: default | flat | mac style: - 属性说明
codeblock.copy_button.enable:true表示启用复制按钮codeblock.copy_button.show_result:true表示点击复制按钮后,是否要显示“复制成功”的提示
配置持续运行时间
- 持续运行时间
- 编辑主题文件:
themes\next\layout\_partials\footer.swig - 在末尾增加如下代码,注意“
var grt= new Date("07/01/2019 00:00:00");”按照实际情况设置。<div> <span id="timeDate">载入天数...</span><span id="times">载入时分秒...</span> <script> var now = new Date(); function createtime() { var grt= new Date("07/01/2019 00:00:00"); now.setTime(now.getTime()+250); days = (now - grt ) / 1000 / 60 / 60 / 24; dnum = Math.floor(days); hours = (now - grt ) / 1000 / 60 / 60 - (24 * dnum); hnum = Math.floor(hours); if(String(hnum).length ==1 ){hnum = "0" + hnum;} minutes = (now - grt ) / 1000 /60 - (24 * 60 * dnum) - (60 * hnum); mnum = Math.floor(minutes); if(String(mnum).length ==1 ){mnum = "0" + mnum;} seconds = (now - grt ) / 1000 - (24 * 60 * 60 * dnum) - (60 * 60 * hnum) - (60 * mnum); snum = Math.round(seconds); if(String(snum).length ==1 ){snum = "0" + snum;} document.getElementById("timeDate").innerHTML = "本站已安全运行 "+dnum+" 天 "; document.getElementById("times").innerHTML = hnum + " 小时 " + mnum + " 分 " + snum + " 秒"; } setInterval("createtime()",250); </script> </div>
配置图片放大显示
- 博客中的图片可以点击放大查看,插件theme-next-fancybox3:
https://github.com/theme-next/theme-next-fancybox3 - 在hexo根目录安装
git clone https://github.com/theme-next/theme-next-fancybox3 themes/next/source/lib/fancybox
- 配置主题_config.yml文件
fancybox: true
- 查看效果即可。
点击头像跳转“关于我”
- next主题默认没有支持点击头像的事件,目前希望达到效果:点击头像跳转到“关于我”页面。
- 编辑主题文件,手工添加链接:
hexo\themes\next\layout\_partials\sidebar\site-overview.swig<img class="site-author-image" itemprop="image" src="{{ url_for( theme.avatar.url | default(theme.images + '/avatar.gif') ) }}" alt="{{ author }}"> 修改为: <a href="/about/"> <img class="site-author-image" itemprop="image" src="{{ url_for( theme.avatar.url | default(theme.images + '/avatar.gif') ) }}" alt="{{ author }}"> </a> - 查看效果即可。
标签云
- 标签云官网地址:
https://github.com/MikeCoder/hexo-tag-cloud,官网中有详细说明。 - 安装标签云模块
npm install -save hexo-tag-cloud
- 将标签云加入页面,编辑主题模板文件:
hexo\themes\next\layout\_macro\sidebar.swig,将如下代码加入该文件中。{% if site.tags.length > 1 %} {% endif %}- 注意要放在“
<div class="site-overview">”下,这样在侧边栏展开时,就能正常显示标签云,在侧边栏不展开时,不会出现标签云。
- 注意要放在“
- 配置:(依据官网介绍)
a. 编辑hexo/_config.yml配置(生效):# 标签云配置 hexo-tag-cloud tag_cloud: textFont: Trebuchet MS, Helvetica textColor: '#5e27e0' textHeight: 25 outlineColor: '#FC6470' maxSpeed: 0.1- i. textFont: 字体
- ii. textColor: 字体颜色
- iii. textHeight: 字体高度
- iv. outlineColor:标签周围的轮廓的颜色
- v. maxSpeed: 文字滚动速度
- 重启即可
hexo clean & hexo g & hexo s
- 至此,标签云可以正常展示。
- 尝试使用其他方式修改标签颜色,达到彩色云的效果(并未实现)。
- 方式1:修改主题_config.yml文件。该文件中有tagcloud属性,但配置后并不生效

- 方式2:修改页面模板中的属性,编辑themes/next/layout/page.swig 中的如下代码行,但修改后并不生效。
{{ tagcloud({min_font: 12, max_font: 30, amount: 200, color: true, start_color: '#ccc', end_color: '#111'}) }}
- 方式1:修改主题_config.yml文件。该文件中有tagcloud属性,但配置后并不生效
几何动态效果
- 常见的hexo博客,背景有几何线条动态效果。该效果是采用nest效果,一个基于html canvas绘制的网页背景效果。
- 网站地址:
https://github.com/theme-next/theme-next-canvas-nest - 进入主题目录:
theme/next - 下载nest源码至主题目录lib下
git clone https://github.com/theme-next/theme-next-canvas-nest source/lib/canvas-nest
- 配置引用,进入主题配置文件中theme/next/_config.yml,增加如下配置:
canvas_nest: enable: true onmobile: true # display on mobile or not color: "0,0,255" # RGB values, use `,` to separate opacity: 0.5 # the opacity of line: 0~1 zIndex: -1 # z-index property of the background count: 99 # the number of lines- i. enable: 启用nest
- ii. onmobile: 移动端是否显示
- iii. color: 颜色
- iv. opacity: 透明度
- v. zIndex: nest样式和背景的堆叠样式。
- vi. count: 线条的数量
- 重启即可。
hexo clean & hexo g & hexo s
- 效果

