安装git
目标:安装git,创建hexo仓库,并创建仅支持git-shell的git用户。使用root用户登录云服务器。
安装git
yum install -y git查看git,执行如下指令,可看到版本
git --version
...
git version 1.8.3.1
给git创建独立用户git,并设置密码(如git)。
useradd git
passwd git
切换到git用户,并创建仓库hexo
- 目录结构:/home/git/projects:项目目录,/home/git/repos:仓库目录。
- 创建项目目录
su git cd /home/git mkdir projects cd projects mkdir hexo - 创建仓库目录
  cd /home/git
  mkdir repos
  cd repos
  git init --bare hexo.git
增加hook钩子函数,支持在git提交之后,将仓库中的文件检出到项目目录。
- 进入目录,并创建文件post-receive
cd /home/git/repos/hexo.git/hook vim post-receive - 输入内容
#!/bin/sh git --work-tree=/home/git/projects/hexo --git-dir=/home/git/repos/hexo.git checkout -f - 增加可执行权限
chmod +x post-receive
- 进入目录,并创建文件post-receive
在本地环境,测试仓库是否可用。
git clone git@39.98.255.120:/home/git/repos/hexo.git- 输入密码后,可正常clone仓库。
配置ssh
- 在本地环境的git bash中,执行如下脚本,生成
ssh-keygen -t rsa -C "邮箱地址" - 生成后,可在诸如
“C:\Users\username\.ssh”的路径中找到id_rsa和id_rsa.pub。 - 将本地环境的密钥文件拷贝到云服务器。
ssh-copy-id -i C:/Users/username/.ssh/id_rsa.pub git@server_ip - ssh-copy-id命令可以把本地主机的公钥复制到远程主机的authorized_keys文件上,ssh-copy-id命令也会给远程主机的用户主目录(home)和
/.ssh, 和/.ssh/authorized_keys设置合适的权限。 - 测试是否可通过ssh登录云服务器,执行如下指令,无需输入密码,可直接进入。
ssh git@server_ip
- 在本地环境的git bash中,执行如下脚本,生成
禁止git用户的shell登录,而只允许执行git-shell,也就是只能用git的相关命令。
- 查看git-shell是否存在于登录方式
cat /etc/shells - 如果存在则不需要操作,否则要执行:
which git-shell,查看git-shell路径,一般是/usr/bin/git-shell,将该路径追加到/etc/shells中即可。 - 修改/etc/passwd中的权限,禁止git用户执行shell:原先:
git:x:1001:1001::/home/git:/bin/bash修改为:git:x:1001:1001:,,,:/home/git:/usr/bin/git-shell - 测试是否可以通过ssh登录云服务器,执行如下指令,提示不成功。
ssh git@server_ip - 测试是否可以执行git,执行如下指令,提示执行成功。
git clone git@39.98.255.120:/home/git/repos/hexo.git
- 查看git-shell是否存在于登录方式
安装nginx
- 使用root用户登录云服务器。
- 执行指令安装nginx
yum -y update yum install -y nginx - 启动nginx服务;
service nginx start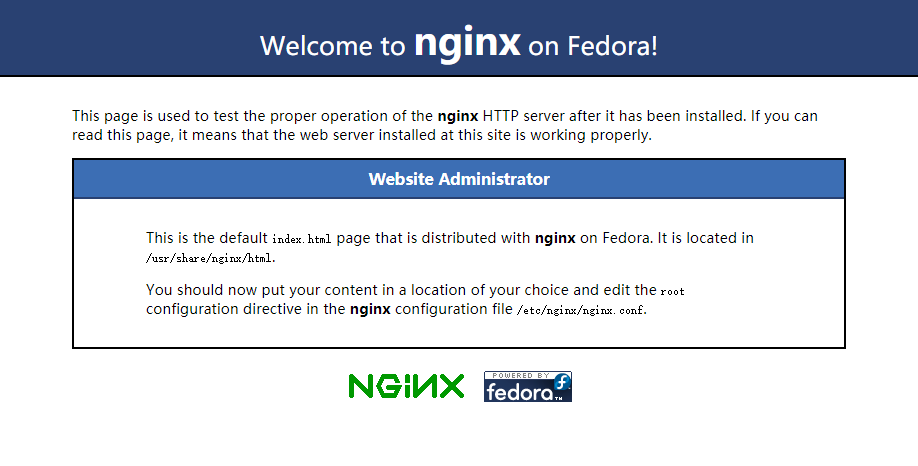
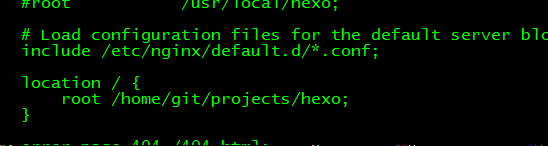
- 进入
/etc/nginx目录,编辑nginx.conf文件,使默认访问hexo目录。- 进入
nginx目录,编辑nginx.conf文件cd /etc/nginx vim nginx.conf - 配置根路径的root为:
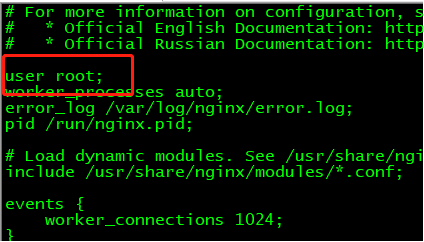
/home/git/projects/hexo,并配置用户由默认的nginx改为root,否则访问不了/home/git/projects/hexo。
- 进入
- 编辑Hello Nginx页面
- 进入hexo目录
/home/git/projects/hexo,创建index.htmlcd /home/git/projects/hexo vim index.html - 编辑index.html内容
<!DOCTYPE html>
   <html>
     <head>
       <title></title>
       <meta charset="UTF-8">
     </head>
     <body>
       Hello Nginx!
     </body>
   </html>
- 进入hexo目录
- 重启nginx,刷新页面后可看到 Hello Nginx! 即可。
systemctl restart nginx - nginx命令(特别注意,当前服务器为centos 7.3,命令为systemctl …)
- 启动:
systemctl start nginx - 停止:
systemctl stop nginx - 重启:
systemctl restart nginx - 重新加载(不重新启动):
systemctl reload nginx - 开机启动:
systemctl enable nginx - 停止开机启动:
systemctl disable nginx - 查看状态:
systemctl status nginx - 查看nginx进程状态:
ps -ef | grep nginx 或者 ps aux|grep nginx
- 启动:
常见错误
Q: centos执行 service nginx start 报错 :Redirecting to /bin/systemctl start nginx.service
A: service nginx start 是centos6.x的命令 , centos7.x使用 systemctl start nginx